这两天在看原生的uiautomator的测试,之前也有使用,但是只是把Android官方的例子简单的实现一样,并没有什么实际的测试意思,Android官方的uiautomator例子的实现,今天结合最近正在做的自动化项目,简单的使用uiautomator来实现了一下,只是做了一个小例子,但是基本上都如何编译jar与运行调通了,这里也简单的记录一下。
之前也有使用别人封装好的python做过,那个写起来也比较简单,使用uiautomator的python封装进行android的UI测试
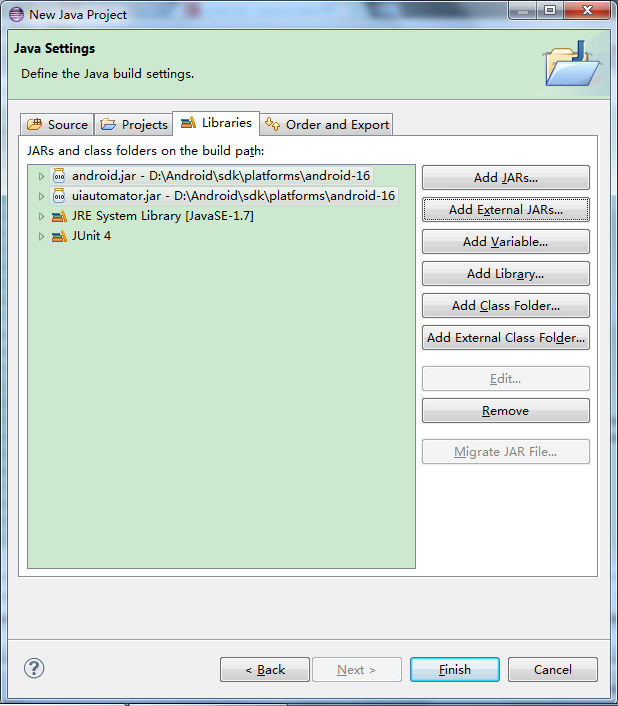
新建一个java工程
新建工程的时候要注意编码要是utf-8的,不然后面使用ant编译jar文件的时候会有问题.
引入JUnit与android.jar和uiautomator.jar,我使用的是api-16的jar,这个16要记住,后面生成build.xml有用
创建测试类
新建的类要继承UiAutomatorTestCase类
我这个操作要用到am命令来启动手机急救箱和关闭急救箱,所以我创建一个util类来封了两个方法
| package com.yangyanxing.test;
import java.io.BufferedReader;
import java.io.InputStreamReader;
import com.android.uiautomator.core.UiObject;
import com.android.uiautomator.core.UiSelector;
public class TestUtil {
public static String doCmdshell(String commond){
String s = null;
try
{
Process p = Runtime.getRuntime().exec(commond);
BufferedReader stdInput = new BufferedReader(new InputStreamReader(p.getInputStream()));
BufferedReader stdError = new BufferedReader(new InputStreamReader(p.getErrorStream()));
String result = "";
while ((s = stdInput.readLine()) != null)
{
result = result + s + "\n";
}
while ((s = stdError.readLine()) != null)
{
System.out.println(s);
}
return result;
}
catch (Exception e)
{
return "Exception occurred";
}
}
//这个方法是在timeout的时间内等待ui元素的出现,出现了返回真,异常了或者超时了返回假
public static Boolean waitForUiselectorAppears(UiSelector selector,int timeout)
{
UiObject uiObject = new UiObject(selector);
return uiObject.waitForExists(timeout*1000);
}
}
|
写具体的测试方法
| package com.yangyanxing.test;
import com.android.uiautomator.core.UiDevice;
import com.android.uiautomator.core.UiObject;
import com.android.uiautomator.core.UiObjectNotFoundException;
import com.android.uiautomator.core.UiSelector;
import com.android.uiautomator.testrunner.UiAutomatorTestCase;
public class UitestRunner extends UiAutomatorTestCase {
//初始化一个UiDevice
private UiDevice mDevice = UiDevice.getInstance();
public UitestRunner(){
super();
}
//写setUp()方法
public void setUp() throws Exception{
super.setUp();
//每次测试的时候都需要启动急救箱,所以将这个方法放到setUp里
TestUtil.doCmdshell("am start com.qihoo.mkiller/com.qihoo.mkiller.ui.index.AppEnterActivity");
}
//写tearDown方法,将急救箱force-stop
public void tearDown() throws Exception{
super.tearDown();
TestUtil.doCmdshell("am force-stop com.qihoo.mkiller");
}
//检测急救箱启动后是否有"开始扫描"按钮
public void test_startScanButton() throws UiObjectNotFoundException{
UiSelector scanButton = new UiSelector().className("android.widget.Button").text("开始扫描");
if(TestUtil.waitForUiselectorAppears(scanButton, 20)){
UiObject scanoObject = new UiObject(scanButton);
if (scanoObject.click()) {
System.out.println("开始扫描 按钮被点击了!");
}else{
System.out.println("开始扫描 按钮点击失败了");
}
}else {
System.out.println("急救箱启动失败");
}
UiSelector exitbutton = new UiSelector().className("android.widget.Button").text("退出");
assertEquals(Boolean.TRUE, TestUtil.waitForUiselectorAppears(exitbutton, 120));
}
}
|
使用android.bat生成build.xml文件
到android sdk目录的tools目录下,使用
android create uitest-project -n mkillerTest -t 2 -p D:\EclipseWorkPlace\uiautomatorTest`
命令生成build.xml
-n 为最终生成的jar包的名字,随意起
-t 为android targets的id,稍后说怎么获得
-p 为刚才创建的工程目录
-t 的值可以通过 sdk/tools 目录下的android list 来获得
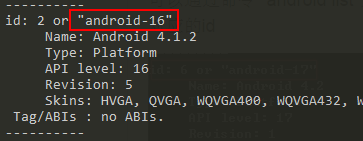
刚才使用的uiautomator的api版本为16,那么对应这里的id值就是2
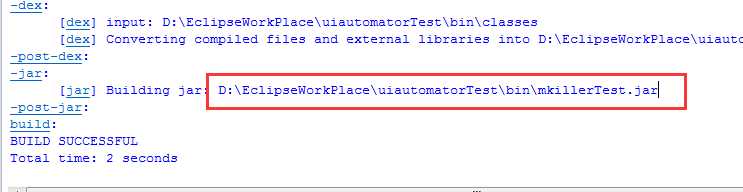
使用ant build...生成mkillerTest.jar文件
刷新eclipse里的工程目录,这个build.xml就会出来了,
右键build.xml选择Run as->Ant build....
在Targets标签里勾选build[from imort${sdk.dir}/tools/ant/uibuild.xml]
然后点击run,如果没有错误的话最终会生成BUILD SUCCESSFUL的提示并且把jar文件位置打印出来
将生成的jar push到手机里进行测试
使用adb push 命令将这个mkillerTest.jar推到手机的/data/local/tmp/目录下
adb push mkillerTest.jar /data/local/tmp/
运行测试
adb shell 到手机里,cd到/data/local/tmp目录下,也可以不cd 到这个目录(只要前面将.jar文件push到/data/local/tmp目录下也行),运行uiautomator命令进行测试
uiautomator runtest mkillerTest.jar
或者
uiautomator runtest mkillerTest.jar -c com.yangyanxing.test.UitestRunner
-c 命令为指定类来跑,当有多个类的时候可以选择只跑部分用例

基本的流程就是这样,以后再扩展吧。
扩展
Uiautomator中watcher的使用