阿里云serverless初体验
最近接触一些serverless的一些内容,基础的内容可以查看 我建议你了解一点儿Serverless ,AWS和国内的云平台提供serverless,我通过几篇文章由浅入深的记录一下在阿里云上使用serverless。
打开 https://www.aliyun.com/product/fc 如果没有开通请先点击开通,开通之后进入“管理控制台”,
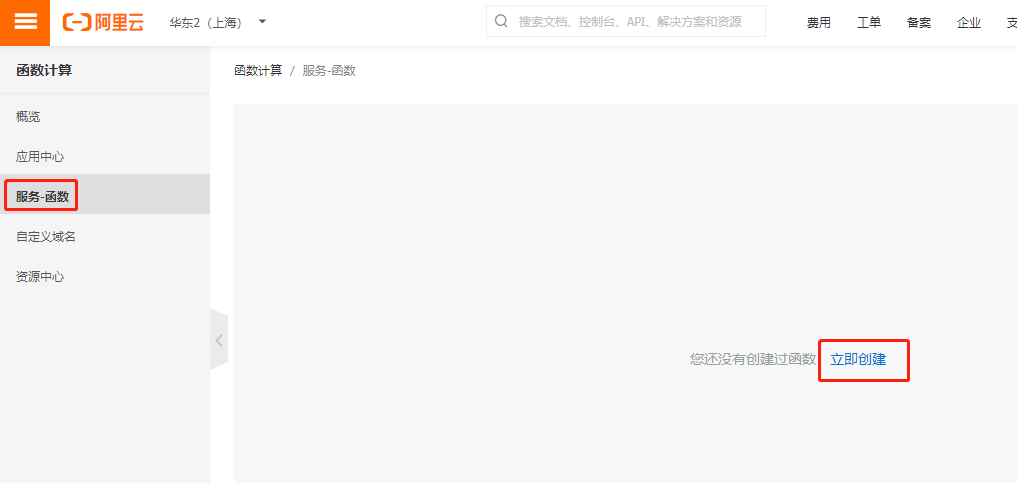
点击服务函数->立即创建
选择 HTTP 函数,在接下来的表单中设置好函数相关的内容
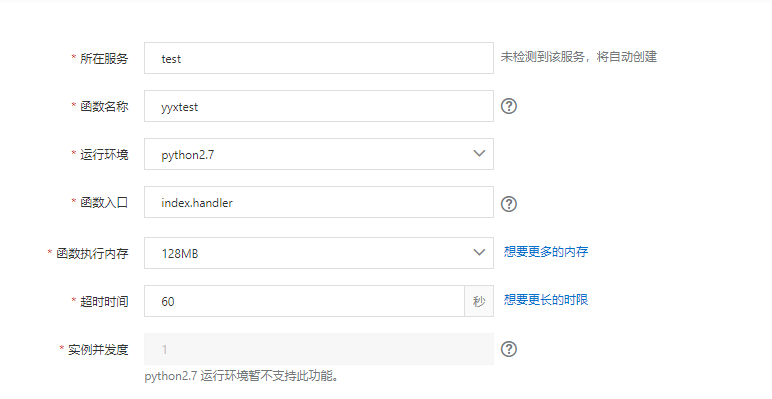
运行环境选择python2.7,函数入口为 index.handler,这个入口函数之后会创建index.py文件,入口函数为handler
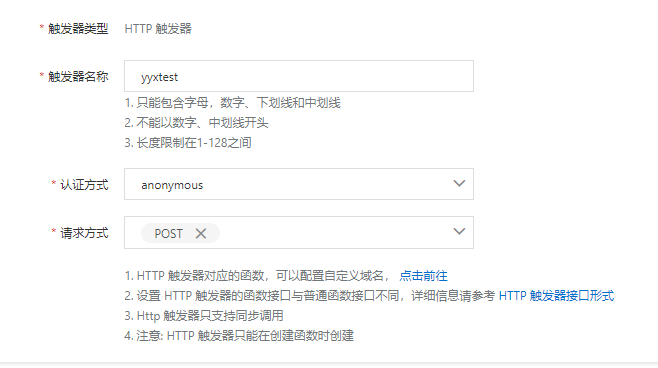
入口方式选择 anoymous,请求方式为post,点击完成,会生成默认的代码
# -*- coding: utf-8 -*-

import logging
HELLO_WORLD = b'Hello world!\n'

# if you open the initializer feature, please implement the initializer function, as below:
# def initializer(context):
#    logger = logging.getLogger()
#    logger.info('initializing')


def handler(environ, start_response):
    context = environ['fc.context']
    request_uri = environ['fc.request_uri']
    for k, v in environ.items():
      if k.startswith('HTTP_'):
        # process custom request headers
        pass
    # do something here
    status = '200 OK'
    response_headers = [('Content-type', 'text/plain')]
    start_response(status, response_headers)
    return [HELLO_WORLD]
先不修改代码,拉到下面的调试
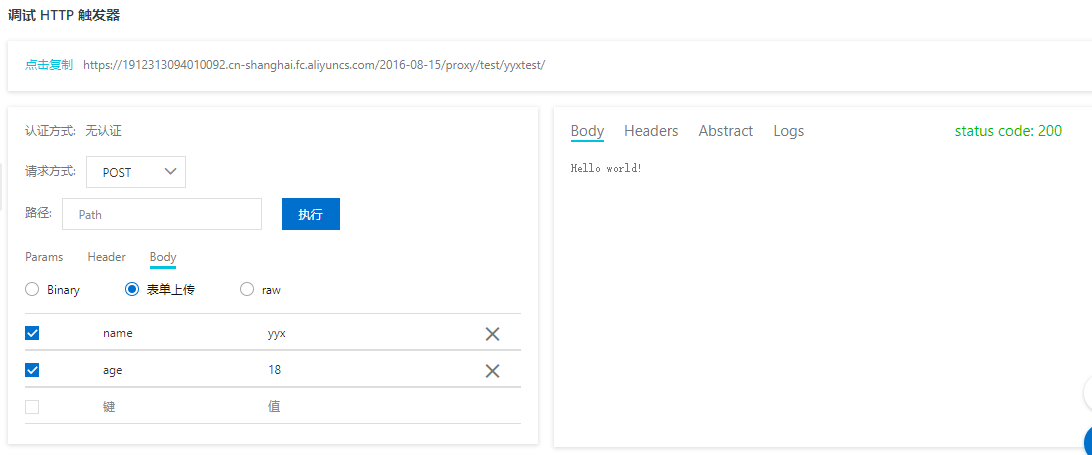
切换到body,选择表单上传,随便填写几个参数,点击执行,看到返回值为 Hello world!
到此我们什么也没有操作就已经在云端生成了一个函数,它的地址是 https://1912313094010092.cn-shanghai.fc.aliyuncs.com/2016-08-15/proxy/test/yyxtest/
当我们使用工具对它发送一个post请求以后就会收到结果
>>> url = r'https://1912313094010092.cn-shanghai.fc.aliyuncs.com/2016-08-15/proxy/test/yyxtest/'
>>> import requests
>>> r = requests.post(url)
>>> r.text
'Hello world!\n'
>>>
目前为止该函数还没有什么作用,我们尝试将收到的form表单写到response中。
修改代码为
# -*- coding: utf-8 -*-

import logging
import json

def handler(environ, start_response):
    context = environ['fc.context']
    request_uri = environ['fc.request_uri']
    try:
        request_body_size = int(environ.get('CONTENT_LENGTH', 0))
    except (ValueError):
        request_body_size = 0
    request_body = environ['wsgi.input'].read(request_body_size)
    print request_body
    status = '200 OK'
    response_headers = [('Content-type', 'text/plain')]
    body = {}
    for i in request_body.split("&"):
        key,value = i.split("=")
        body[key] = value
    print body
    start_response(status, response_headers)
    return [json.dumps(body)]
主要的代码就是通过environ.get('CONTENT_LENGTH', 0) 获取到post过来的数据长度,再通过 environ['wsgi.input'].read(request_body_size) 来读出内容
点击上面的save按钮,再点击下面的执行, 此时得到的打印输出为
FC Invoke Start RequestId: 0183cee0-caff-40d2-8553-66af84e9f57f
name=yyx&age=18
{'age': '18', 'name': 'yyx'}
FC Invoke End RequestId: 0183cee0-caff-40d2-8553-66af84e9f57f
而函数返回的结果为
>>> data = {'name':"yangyanxing","age":18}
>>> r = requests.post(url,data=data)
>>> r.text
'{"age": "18", "name": "yangyanxing"}'
可以看出函数已经生效上线,拿到上传的数据我们就可以为之后的操作做准备了,本次的初体验就到此,可以到云函数非常简单小巧,上线非常快,之后我们来尝试使用在数据库中做些查询操作。